 ) to download and view a video of the new feature. The videos are in .WMV format and play in Windows Media Player or your default video playback software.
Note: Click the play icon () to download and view a video of the new feature. The videos are in .WMV format and play in Windows Media Player or your default video playback software.
The new HD-SuperNEST Module adds a time-based nesting engine that is designed to give you the best yield in the specified time interval. When you use HD-SuperNEST, the engine starts with an initial benchmark and then tries different nest configurations. If a better nest is found within the specified time interval, that nest is accepted and the timer resets. As the engine tries more layouts, the timer resets every time a better nest is found. This continues until the yield cannot be increased within the given interval, or until you click Stop to accept the current yield.
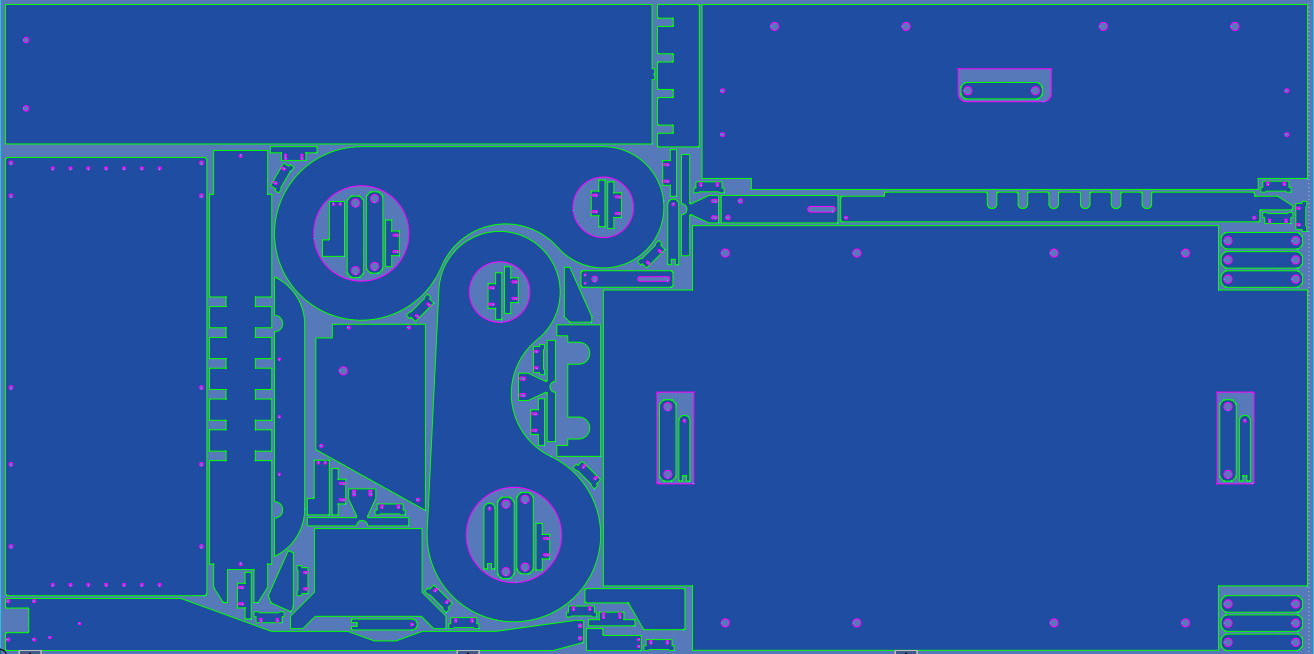
The HD-SuperNEST engine provides the best yields of any SigmaNEST engine yet, and adds new features that are ideal for customers who cut composites or use laser machines. To schedule a demo or learn more about this module, please contact your SigmaNEST sales representative.
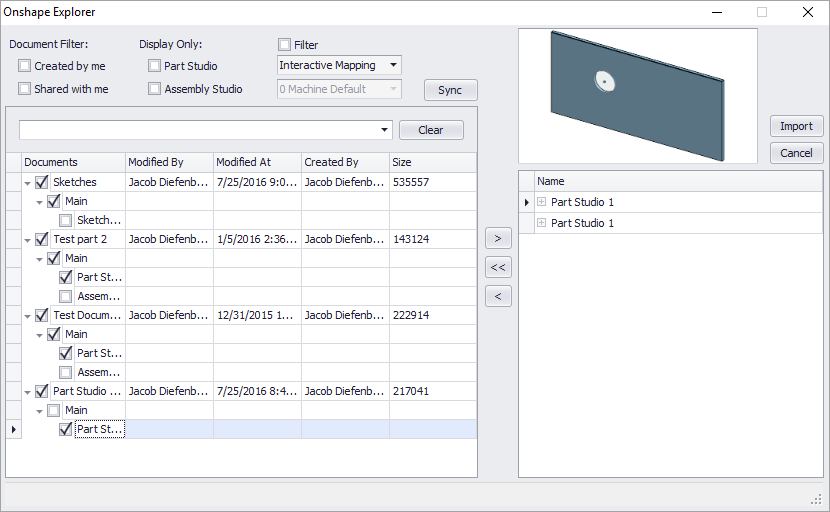
The new Onshape Import Module allows you to import CAD files from any Onshape account. Using the Onshape Explorer, you can filter, search, and select part and assembly studios for direct import into SigmaNEST. To schedule a demo or learn more about this module, please contact your SigmaNEST sales representative.
We've added a new part order sorting method called Small Parts First, which gives priority to small parts when nesting. You can use the Advanced tab of the Task Parameters to define the maximum dimensions for small parts. Alternatively, you can designate specific parts as small parts in the Grain tab of the Part Parameters.
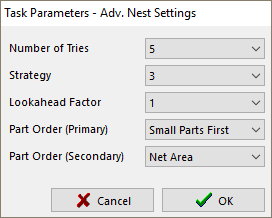
The new Part Order (Secondary) drop-down menu allows you to select a secondary part order for the WO Sort and Small Parts First sorting methods. For WO Sort, the secondary part order is applied to parts which share a priority level. For Small Parts First, the secondary part order is applied first to small parts and then to all remaining parts. For all other sorting methods, this option is unavailable.
Using the new CTL Parts Library, you can now create and manage standalone CTL parts. To open the library, click the View CTL Tasks drop-down arrow in the Work-space tab, then select CTL Parts Library.
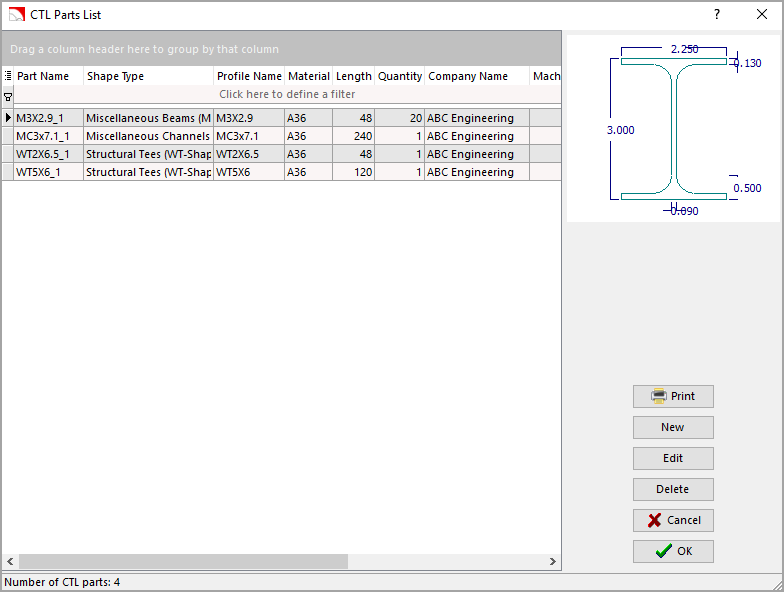
To add library parts to a task, open the Create New CTL Task function from the Work-space tab, then click CTL Parts Library. Select parts to add to your work order, then click Load to confirm your selection.
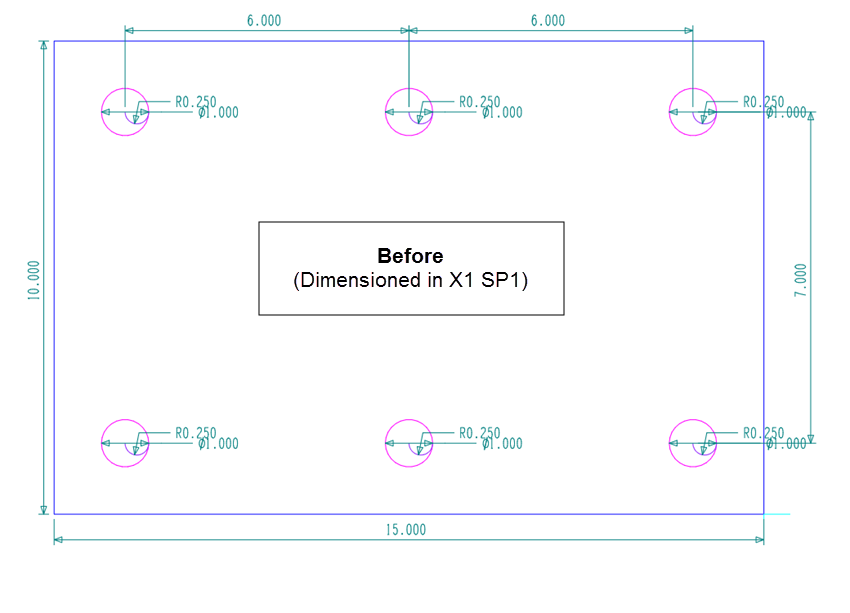
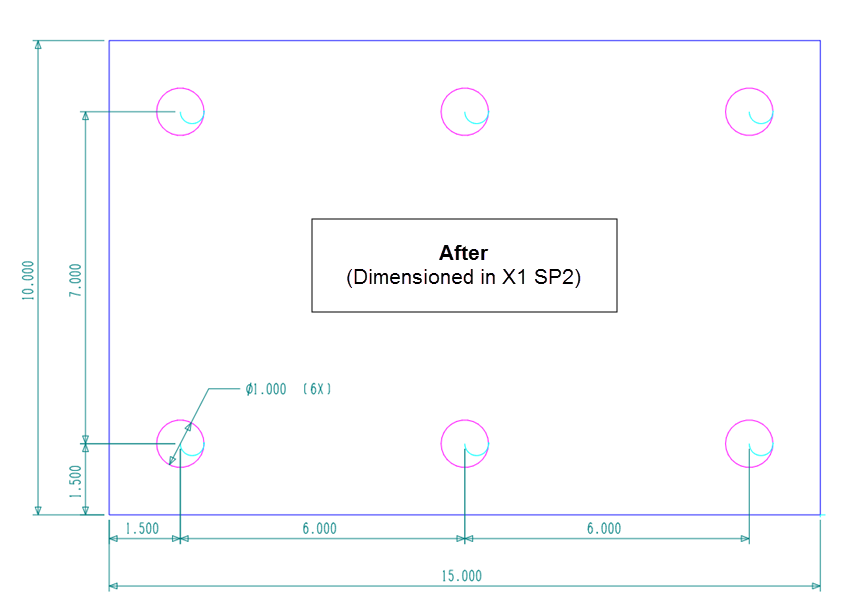
The new Dimensions \ Notes tab in the Configuration Settings contains all options related to dimension and note formatting. Auto Part Dimension settings have also been added to this tab, allowing you to specify dimension rules and reference points for this feature. The Auto Part Dimension function itself has also been completely overhauled, and now gives more accurate results that are simple and easy to read.
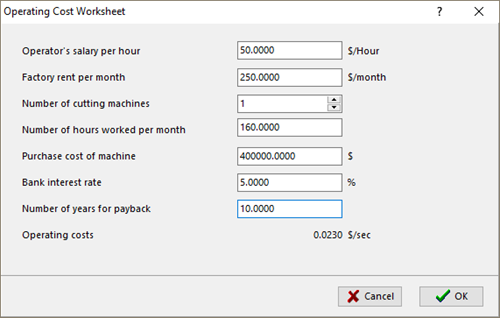
The new Production Cost Worksheets calculate Operating, Cutting, and Pierce Costs. To access these worksheets, open the Technology Setup and select the Production Costs tab. Click the Value field for Operating Cost, Cutting Cost, or Pierce Cost, then select the ellipsis button (  ) to open the worksheet. Enter your own values, then click OK to save the calculated cost value. Full explanations of each costing formula are available in the SigmaNEST help file.
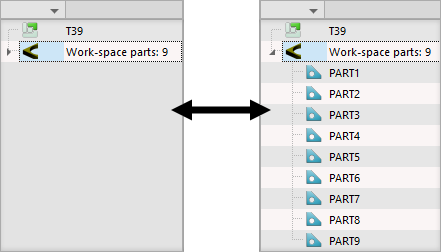
Work order parts now automatically lock when you load them into the Work-space. The duration of the lock is specified in the Configuration Settings > Defaults tab. You can view the lock holder and the expiration date and time from the Work Order Parts List. If you have the proper security permissions, you can also manually unlock a part from the list by right-clicking the part and selecting Unlock.
The Sheet List now identifies allocated sheets with a plus sign (+) to the left of the sheet. Click the plus sign to view the quantity allocated, the lock holder, and the lock expiration date and time.
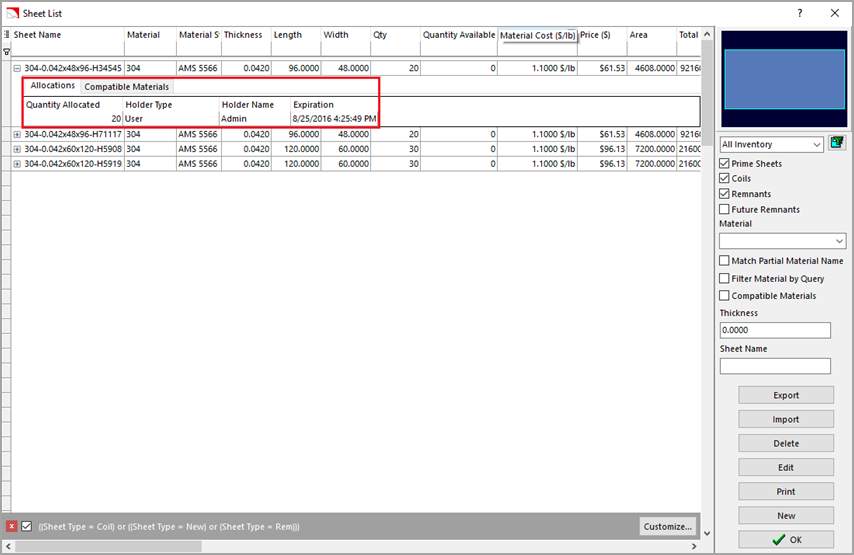
Additionally, you can right-click a sheet from the list and select Cancel Selected Allocations to cancel the lock, or select Cancel Allocations Held by Me to cancel all locks for your profile.
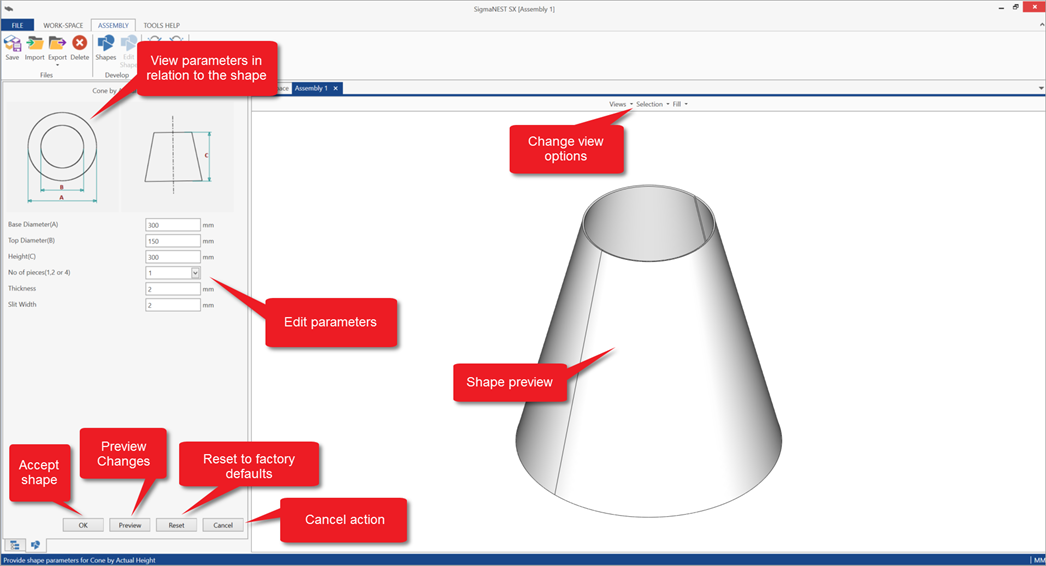
Customers with SigmaNEST SX can click the new Develop Shapes button in the Work-space tab to open SigmaNEST SX. Here, you can select, customize, and unfold 3D shapes before directly importing them back into SigmaNEST.
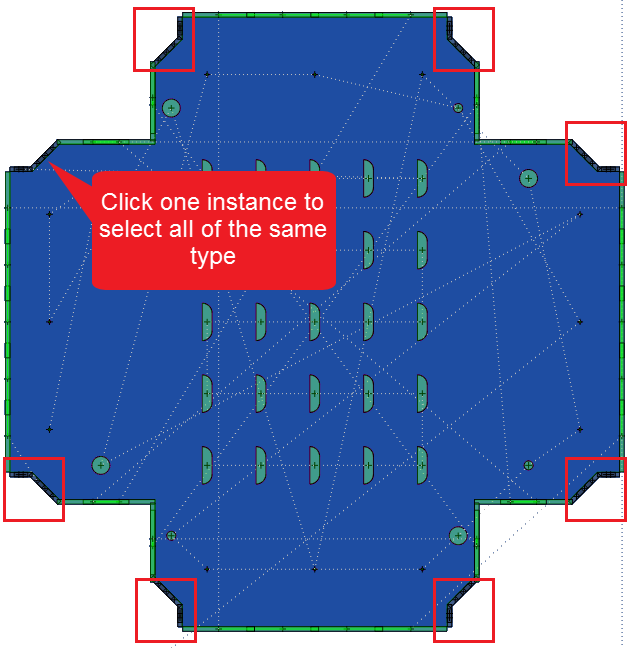
The new Delete NC by Tool/Process feature allows you to easily remove all instances of a selected tool hit or NC process from a shared contour. Click the Clear NC drop-down arrow in the Nesting NC tab, then select Delete NC by Tool/Process. Click a tool hit to select all hits of the same type on the contour, then right-click to remove the selected hits.
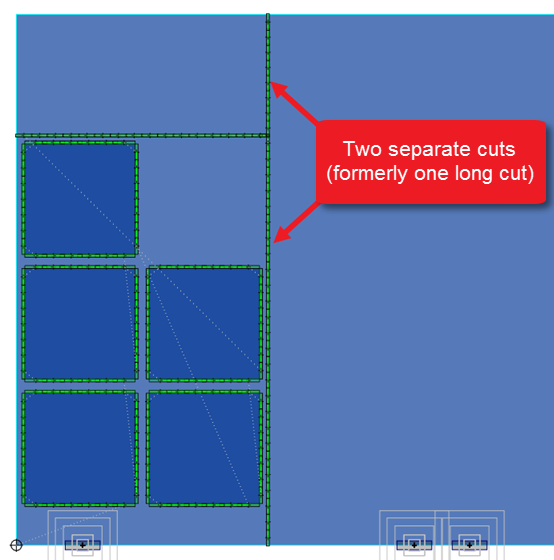
When using the Vertical Preference or Horizontal Preference sheet crop type, the main crop line is now broken into two cuts at the intersection. This gives you full control over crop cut reordering and allows you to specify which scrap piece is completed first.
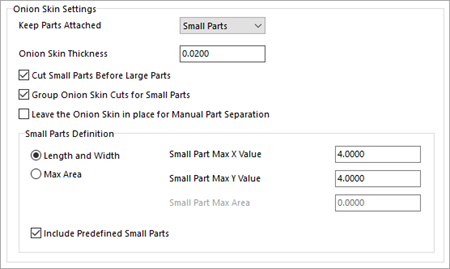
The following settings have been added to the Multi Pass tab of the Auto NC dialog box to give you greater control over onion skin cuts.
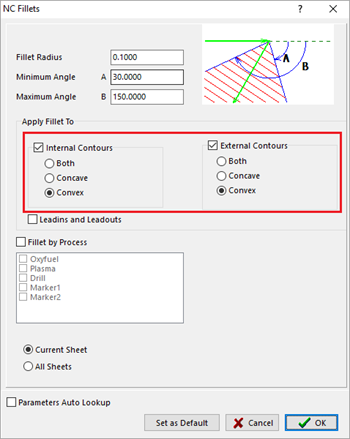
New settings for NC Fillets have been added, allowing you to specify whether to apply fillets to concave corners, convex corners, or both. In the NC Fillets dialog box, select Internal Contours and/or External Contours, then choose which corner types to apply the fillets to.
 icon. The number of parts in the Work-space is also noted here.
The following features are now available to SigmaNEST Companion users:
SigmaNEST SX now has a dedicated Help Center, located in the Tools Help tab. Click the help icon to launch the Help Center in your default browser. The help file is stored locally and can be viewed from any computer, with or without an Internet connection.
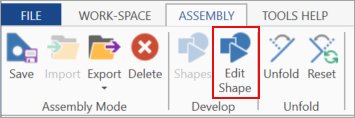
You can now edit created parts by clicking Assembly > Edit Shape.
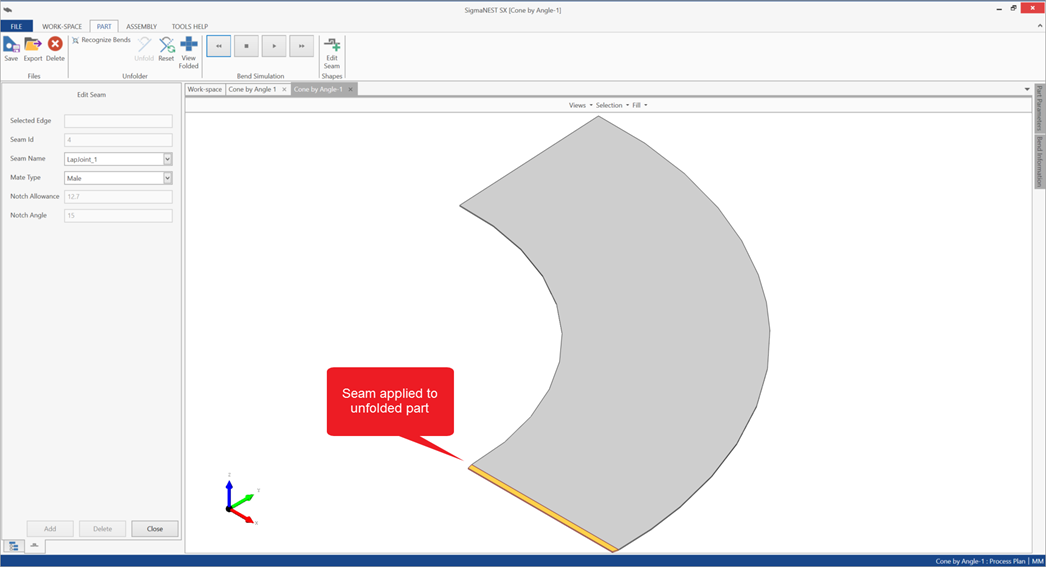
You can edit the seams of both created and imported parts using the new Seam Table and Edit Seams function. See the SigmaNEST SX Help Center to learn more about this feature.
You can now access the SimTrans help file directly from the Configuration dialog box. We've also added new variables to the QT transactions to assist in automating your quoting system. Please view the SimTrans help file for a comprehensive list of variables by transaction.
The Color Offload user interface has been translated into German. To change the UI language, open the Config and use the Language drop-down menu to select the language of your choice.