) to view a video of the new feature. The videos are in .WMV format and play in Windows Media Player or your default video playback software.
The following are new or updated features in SigmaNEST 10.2.
Click the play icon () to view a video of the new feature. The videos are in .WMV format and play in Windows Media Player or your default video playback software.
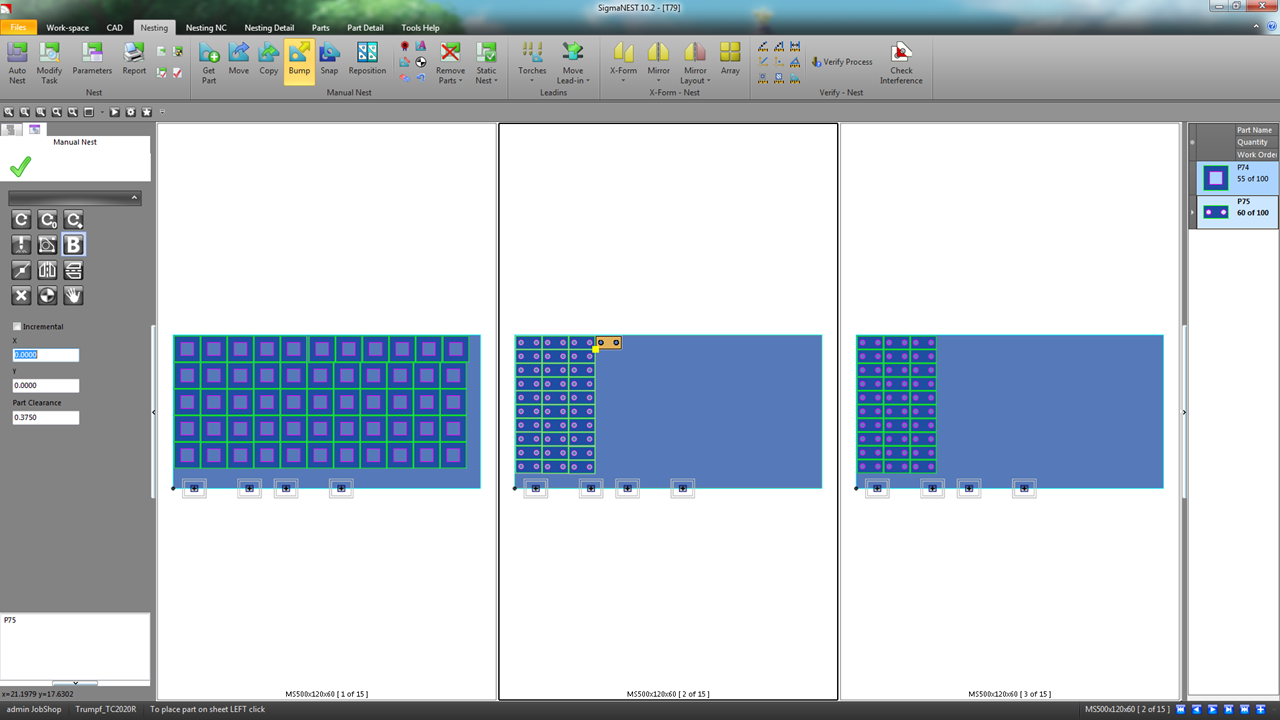
You can now use Split Window (located in the Quick Access Toolbar) to split your Work-space into multiple windows. This allows you to view different areas of the Work-space at the same time. The Work-space is split into evenly sized windows based on the type of grid you select when splitting the window.
You can also manually nest parts across the split windows and onto other sheets. This allows you to quickly nest parts onto multiple different sheets without having to select the layout from the list.
You can now apply special lead-ins to tabs manually added to part. The special lead-ins available are set by selecting the Available as Standard Lead-in check box from the Special Lead-in dialog box.
Once set, you can click the Use Special Lead-ins check box and then click the ellipses (...) to open the Tab Special Lead-in dialog box. You can then select the special lead-in from the Special Lead-in drop-down list and change the parameters as needed.

You can now select the Horizontal Line Crop Type in the Crop Sheet Dialog box. This crop type applies only a horizontal crop line to the sheet. This is commonly used when parts are placed on the bottom of the sheet that extend to the sheet edge and there is a large amount of remaining material above the parts.
The following punching features have been added or enhanced:
You can now click the Select Tool Rotation from Geometry alignment option ( ) to automatically rotate the tool to match the geometry of the selected contour on the part. The following enhancements have been made to punch scrap cutting:
![]()
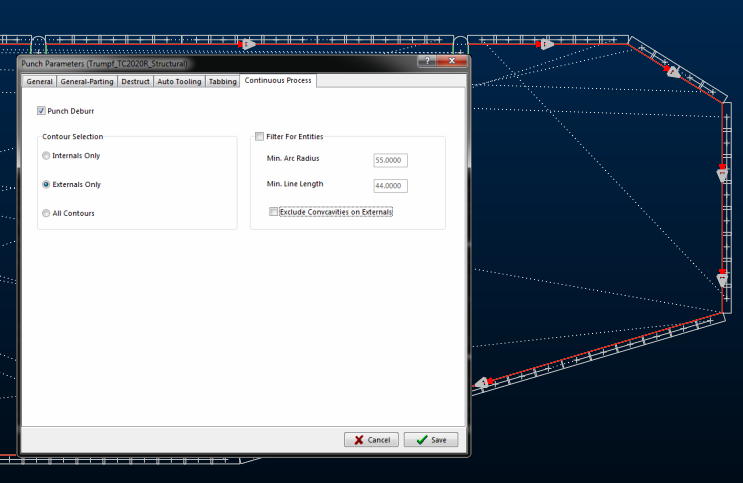
You can now enable a punch deburring process from the Continuous Process tab of the Punch Parameters. Punch deburring is applied as an additional finishing process that runs along a part's contours to ensure that parts are free of burs left from the first pass of punching tools. Applying this additional process increases the quality of part edges and produces higher quality parts.
You can now click Set as Default to save your Color, Font Style, and Note Height settings as the default values for notes and dimensions. These values are automatically applied to all new dimensions and notes until you save new default values.
You can now choose to only apply tabbing to internal or external contours from the Auto Tab dialog box by clicking the Apply to Internal Contours or Apply to External Contours check boxes.
When you attempt to rename a BOM that is also a Sub BOM, the BOM Rename Warning dialog box displays and lists all the BOMs affected by the rename. If you select the Fix Selected References check box, all the BOMs selected in the list are automatically updated when you click Yes. Any BOMs not selected must be manually updated.
The following enhancements have been made to the Part Parameters - Part Data tab:
Allows you to specify that the part revision is able to be released to manufacturing for cutting. This is commonly used with parts that had previous revisions that were not yet ready for cutting or were still in development. Once the part is ready, this check box is selected to show that the part can now be cut.If you try to add a part to a nesting task that does not have the Released to Manufacturing check box selected, a prompt appears informing you that some parts are not set to released and asks if you want them removed. Click Yes to remove these parts from the task. Click No to add them to the task. You can then continue to nest and post the parts not yet released to manufacturing.
The Sheet Defaults section in the Defaults tab of the SigmaNEST Configuration now allows you to specify a Remnant Name Prefix. Setting this to a different value than the Sheet Name Prefix allows your created remnants to have unique names. For example, if your prefix is REM and you create a new remnant, the new remnant name defaults to REM with the next incremented number, such as REM4.
If you have the Keep remnant name the same as stock sheet check box selected on the System 2 tab, the value you specify for the remnant prefix is overridden by the stock sheet name. Uncheck this option if you want to use remnant name prefixes.
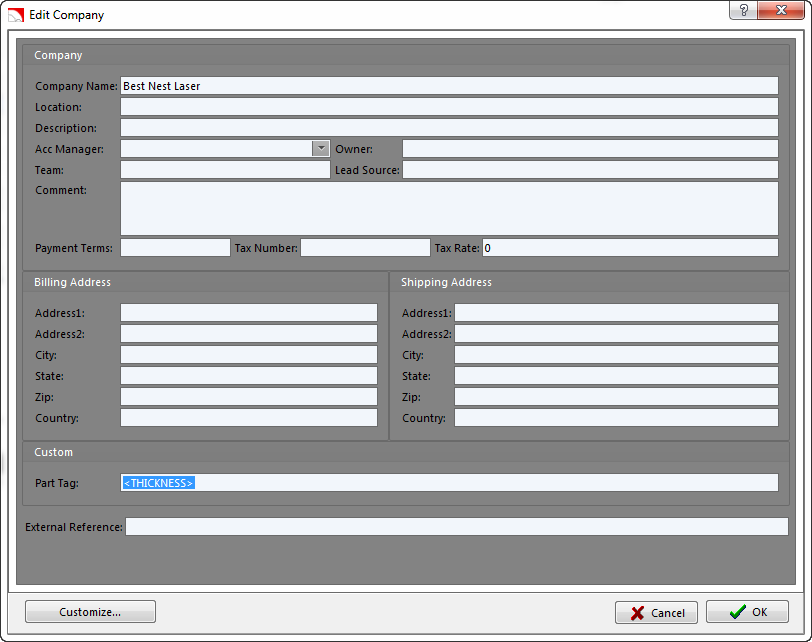
You can now add a Part Tag variable when adding or editing a company in the Information Manager. This allows you to generate a unique bar code that is printed on your report when you print the report from the Nesting tab.
You must enter the variable in the following format:
<PARTDATAFIELD>
For example, you can enter <PARTDATA2> to use the information in the Part Data 2 field to generate the bar code or enter <THICKNESS> to use the part thickness. Other tags, such as BIN Number, Heat Number, Location, Sheet Data, and Task Name can also be used.